
Step 6 – Monitor and Adjust: Observe the system and tweak the settings over time.
Once your auto irrigation experiment has started, you will need to monitor the results over time.
- You can see your data on the datalogger board itself by going to menu option 2, “Soil and Water Sensor”, then menu option 11, “Irrigation Data”, and menu option 12, “Plot Data”.
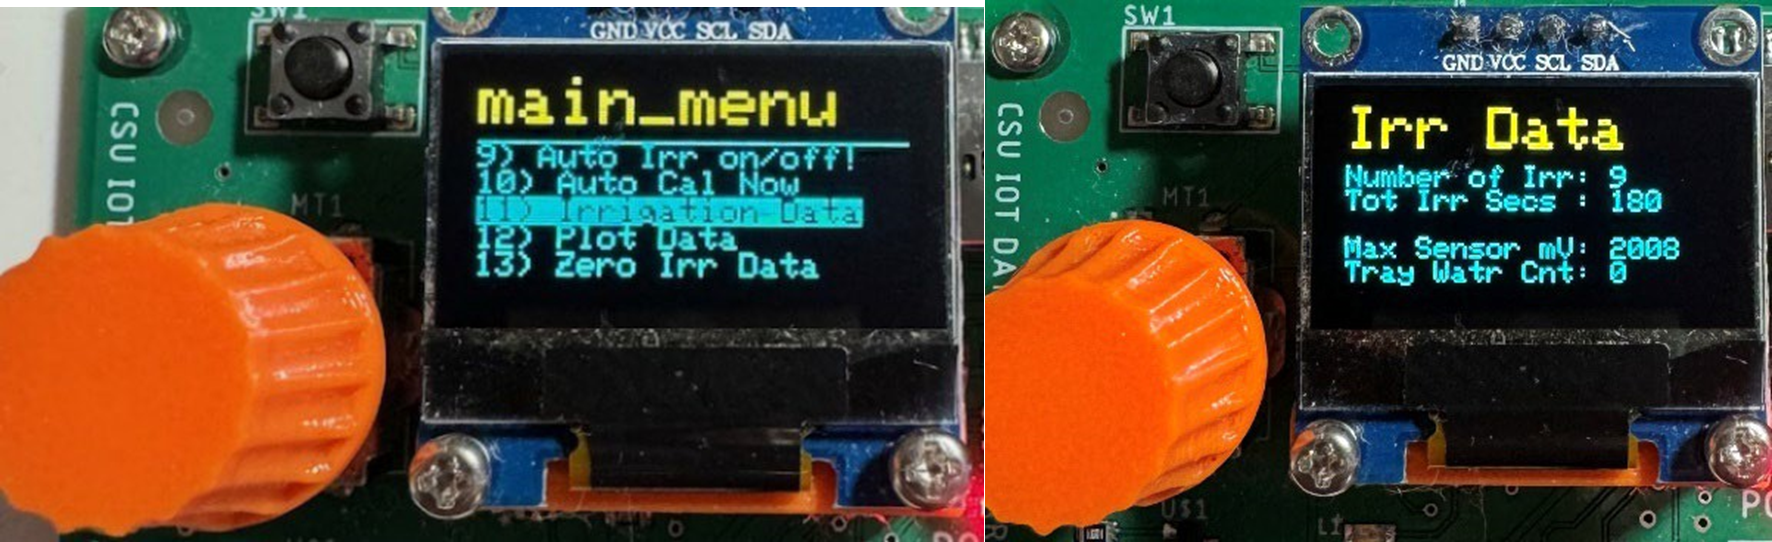
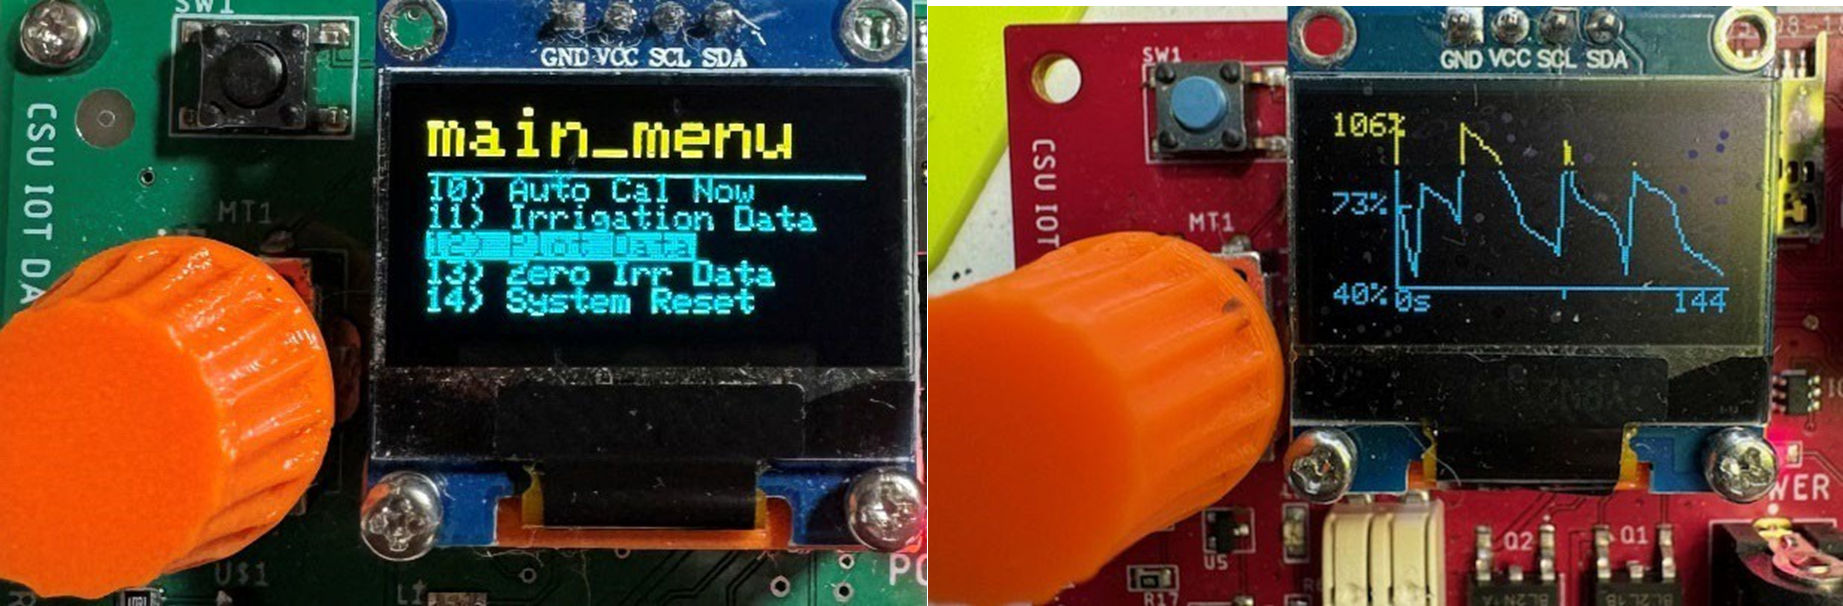
Menu option 11 shows the number of irrigations and the total pump time in seconds. The plot shows % field capacity for the last six days.
As your experiment proceeds, you will likely need to adjust the irrigation trigger point (menu option 6).
- We initially set this value to 50% – that is, when the soil moisture gets below 50%, irrigation will be triggered.
- If your plant is wilting before it waters, you need to increase this value to irrigate soon in the drying cycle (e.g., change from 50% to 60%).
- On the other hand, if you think your system is watering too often and water-logging the plan, you might need to reduce this value.
You will also need to adjust the irrigation duration, menu option 7. We set that value at 60 seconds to start with.
- You want the amount of water applied to completely wet the soil in the pot but not overwater and leach water out the bottom (completely flood the drainage saucer).
- If you set the duration too large, you might pond so much water on the top of the pot and see water spill over the rim of the pot, or you might see lots of standing water in the tray – both are signs the duration is too long.
- On the other hand, if you never see any water in the tray, you may need to increase the duration.
- Also, every time there is an auto irrigation, the % field capacity should return to nearly 100%. Look at your plot (menu option 12) to see if you are getting the soil back to full field capacity.
Remember, after you adjust the trigger point or duration, you will need to let it automatically execute another dry down and triggered irrigation before you can re-evaluate your settings.
- It’s a slow process that often takes a couple of weeks.
- However, after it’s all ‘dialed in’, it usually runs flawlessly for weeks without any adjustments.
We have found that a soil moisture trigger point between 45% and 65% works for most situations. When using one-gallon posts, an irrigation duration between 50 and 80 seconds is a good range.
If you are using larger containers, you will need to increase the irrigation duration. When you get the trigger point and irrigation duration ‘dialed in’ correctly, you will only see a small amount of drainage water in the saucer/tray after an irrigation event, and the plant will never show signs of water stress (i.e., wilting).
- If you see the plant wilting before irrigation, increase the trigger point by 10% so watering occurs earlier in the drying cycle.
- If you think the system is watering the plant too often (waterlogged), decrease the trigger point by 10%.
- If you don’t see any water in the saucer/tray after irrigation, increase the irrigation duration by 10 to 20 seconds.
- If you see a lot of water in the saucer after irrigation, decrease the irrigation duration by 10 or 20 seconds.
Make sure to monitor the water in your bucket. It’s easy to forget and let your plant run out of water.
- It’s a good idea to measure the water in the bucket each week with a meter stick and write the results (date and depth) on a note stuck to the side of the bucket.
- You could also measure and record plant height at the same time.
If your plant shows signs of a nutrient deficiency, you can add some soluble fertilizer to the water in the bucket. This is called fertigation. Be sure to follow the directions on the fertilizer label to avoid over-fertilizing the plants.
- Also, keep an eye out for insect pests like aphids or spider mites. You might need to use some insecticidal soap to keep these critters in check.
Optional, if you have completed the lessons that connect your system to Thingspeak using Wi-Fi, you will be able to monitor soil moisture over time on your Thingspeak data dashboard.